Nullaeus Boost Torment’s Rise Delve (Tier 8 & 11) | misti.services | misti.services Blog
By misti.services
Nullaeus Nemesis Delve Guide (Torment’s Rise) – Tier 8 & Tier 11 Strategy
The Torment’s Rise Delve introduces one of the most challenging encounters in WoW Midnight Season 1 — Nullaeus, the first Nemesis boss. This guide is built to help you understand the mechanics, avoid common mistakes, and clear both Tier 8 and Tier 11 efficiently.
If you're struggling with wipes or want a faster, guaranteed clear, this is also one of the most popular delves our team completes daily for clients.
What Is the Torment’s Rise Delve?
Torment’s Rise is a single-boss delve located in The Voidstorm, featuring Nullaeus as its only encounter. The difficulty scales significantly between tiers, making it one of the most punishing solo or duo challenges early in the season.
Recommended Item Level
Tier 8: 255+
Tier 11: 274+
Despite the difficulty, the rewards are extremely valuable, including Hero Dawncrests, achievements, and exclusive cosmetics.
Torment’s Rise Location
The delve is located in the southeast part of The Voidstorm, just north of Obscurion Citadel.
Coordinates:/way #2444 61.16 71.84
Nullaeus Boss Mechanics Explained
Understanding the core abilities is critical for surviving this fight.
Core Abilities (All Phases)
Imploding Strike
A heavy single-target attack that targets the highest threat player.Emptiness of the Void
The most dangerous ability. This must be interrupted every time or it will likely result in a wipe.Devouring Essence
A stacking damage-over-time effect. If not dispelled, it becomes overwhelming very quickly.
Nullaeus enters intermission phases at The Torment’s Rise Delve introduces one of the most challenging encounters in WoW Midnight Season 1 — Nullaeus, the first Nemesis boss. This guide is built to help you understand the mechanics, avoid common mistakes, and clear both Tier 8 and Tier 11 efficiently. If you're struggling with wipes or want a faster, guaranteed clear, this is also one of the most popular delves our team completes daily for clients. Torment’s Rise is a single-boss delve located in The Voidstorm, featuring Nullaeus as its only encounter. The difficulty scales significantly between tiers, making it one of the most punishing solo or duo challenges early in the season. Tier 8: 255+ Tier 11: 274+ Despite the difficulty, the rewards are extremely valuable, including Hero Dawncrests, achievements, and exclusive cosmetics. Explore Our Services Midnight Boosting & Services The delve is located in the southeast part of The Voidstorm, just north of Obscurion Citadel. Coordinates: Understanding the core abilities is critical for surviving this fight. Imploding Strike Emptiness of the Void Devouring Essence Nullaeus enters intermission phases at 75%, 50%, and 25% health, introducing additional mechanics that persist for the rest of the fight. At 75%, Nullaeus becomes immune and summons Razorshell Ravagers while activating the first Void Orb. Adds use leap and bleed abilities Void zones begin covering sections of the room Use cooldowns to eliminate both adds as quickly as possible Start positioning carefully around void zones Keep the boss near safe areas as zones rotate Failing to clear adds before the boss returns significantly increases difficulty. This is where the fight becomes significantly harder. 7 Spitting Ticks spawn A moving Black Hole appears and pulls players Use AoE damage and crowd control immediately Save mobility abilities for the Black Hole Avoid being pulled into dangerous zones or overlapping damage This phase often causes wipes due to poor positioning and lack of control. Nullaeus becomes immune again and summons an Enslaved Voidcaster. Interruptible casts and ground effects Long-duration movement slow Interrupt once, then save interrupts for the boss Focus on survival rather than killing the add Prepare for the final phase immediately after Once Nullaeus returns after 25%, the fight becomes a pure damage race. Use all offensive cooldowns (Heroism, potions, etc.) Ignore the Voidcaster Focus entirely on finishing the boss Delaying here usually leads to getting overwhelmed by combined mechanics. Tier 11 is identical in mechanics but far less forgiving. All abilities deal significantly higher damage Missing interrupts results in instant death Black Hole movement is more punishing This difficulty requires near-perfect execution and proper gearing. Optimizing your companion setup makes a major difference. Set Valeera to Healer Handles dispels automatically Removes bleed effects Allows you to focus on interrupts and damage Set Valeera to DPS Covers interrupts consistently You handle dispels Depends on your class: Weak interrupt → Valeera DPS Pet classes → Valeera Healer Survival issues → Valeera Tank Choosing the right curios improves both survivability and damage output. Porcelain Blade Tip – Best for increasing critical strike chance Sanctum’s Edict – Strong defensive shield at max stacks Time Lost Edict – Provides cooldown reduction and mobility bonuses Completing this delve offers some of the best early-season rewards. 30 Hero Dawncrests “My Shady Nemesis” achievement Nullaeus Domaneye transmog Dominating Victory Toy “Lighting the Dark” achievement The Ominous title “Let Me Solo Him: Nullaeus” Arcanovoid Construct mount Most failures come down to: Missed interrupts on Emptiness of the Void Poor add control during intermissions Bad positioning with Void Zones and Black Hole Lack of cooldown management in the final phase This encounter is designed to punish mistakes quickly, especially on Tier 11. If you don’t want to spend hours wiping or gearing up just for this encounter, our team at misti.services offers fast and reliable Torment’s Rise Delve boosts. Guaranteed Tier 8 or Tier 11 completion Professional players with optimized setups Fast delivery with zero risk to your account Optional full solo completion for exclusive rewards This is the fastest way to secure your Hero Dawncrests, achievements, and mount without frustration. Nullaeus is one of the most challenging early encounters in WoW Midnight. With proper execution, it becomes manageable — but for most players, it remains a time-consuming and punishing fight. Whether you want to master it yourself or skip the grind entirely, this delve is absolutely worth completing for the rewards alone. For the fastest results, professional completion remains the most efficient option.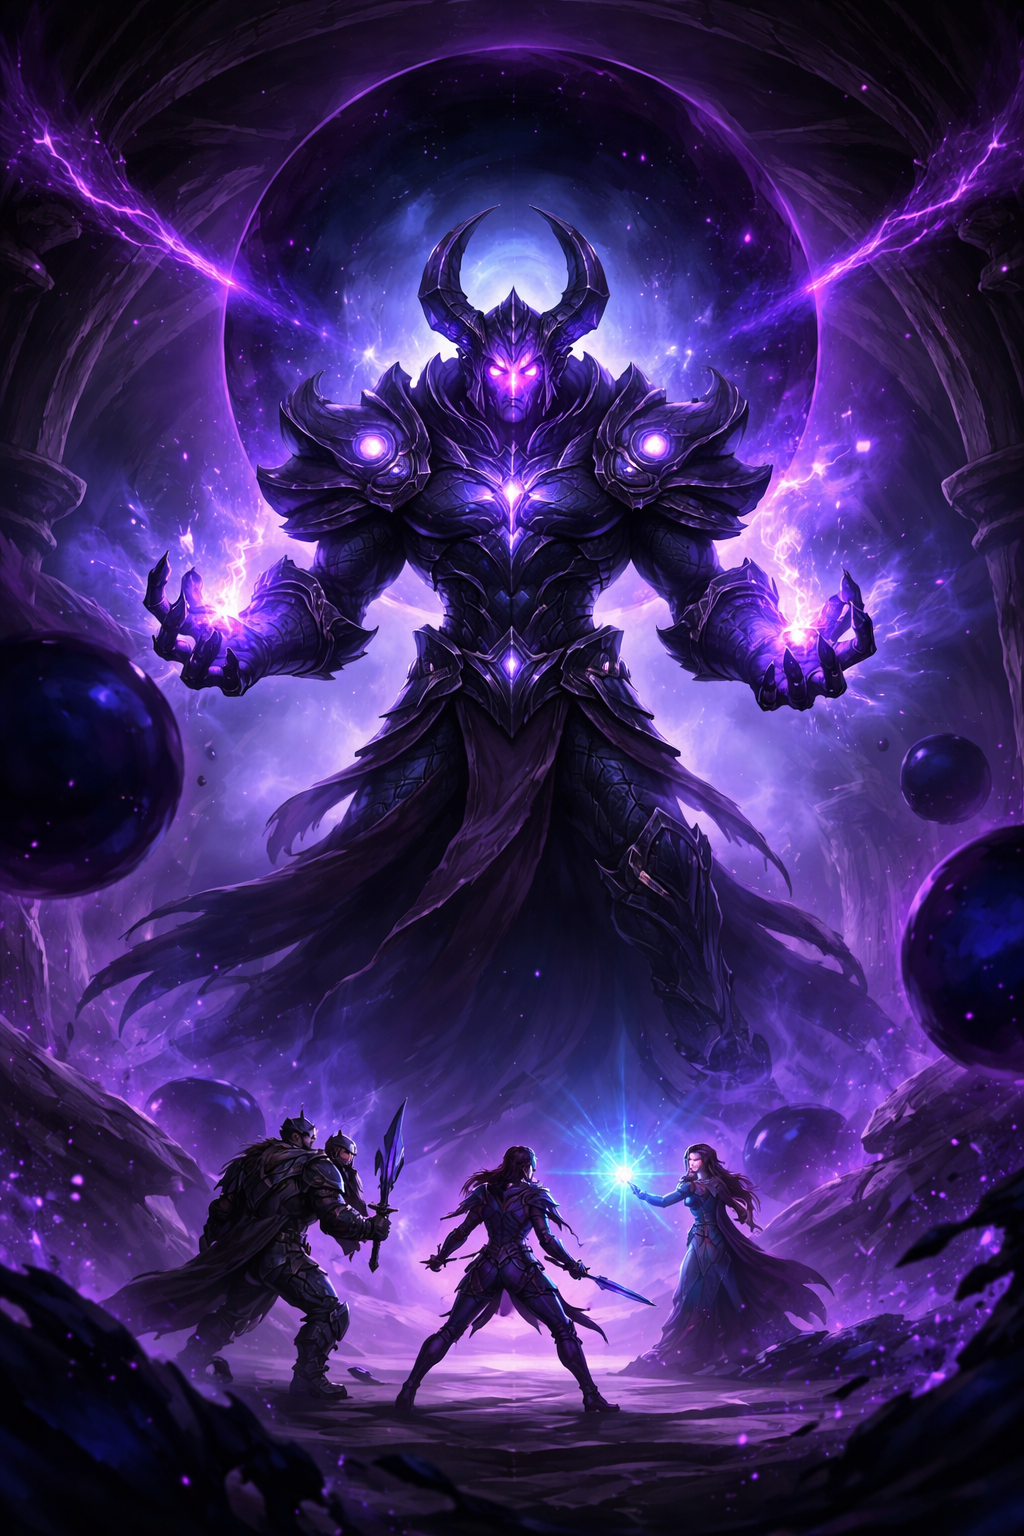
Nullaeus Boost Torment’s Rise Delve (Tier 8 & 11) | misti.services
Nullaeus Nemesis Delve Guide (Torment’s Rise) – Tier 8 & Tier 11 Strategy
What Is the Torment’s Rise Delve?
Recommended Item Level
Torment’s Rise Location
/way #2444 61.16 71.84Nullaeus Boss Mechanics Explained
Core Abilities (All Phases)
A heavy single-target attack that targets the highest threat player.
The most dangerous ability. This must be interrupted every time or it will likely result in a wipe.
A stacking damage-over-time effect. If not dispelled, it becomes overwhelming very quickly.Intermission 1 Strategy (75%)
Key Mechanics
Strategy Tips
Intermission 2 Strategy (50%)
Key Mechanics
Strategy Tips
Intermission 3 Strategy (25%)
Key Mechanics
Strategy Tips
Final Phase Strategy
What To Do
Tier 11 Difficulty Differences
Best Valeera Setup for Nullaeus
For DPS and Tanks
For Healers
For Ranged DPS
Best Curios for Torment’s Rise
Torment’s Rise Rewards
Standard Rewards
Tier 11 Rewards
Solo Tier 11 Reward
Why Players Struggle With Nullaeus
Get Your Nullaeus Boost – Fast and Safe
What You Get
Final Thoughts
-Kcc3aF3dlR3BLcf4gS4Y8Ind8tGCcn.webp)
